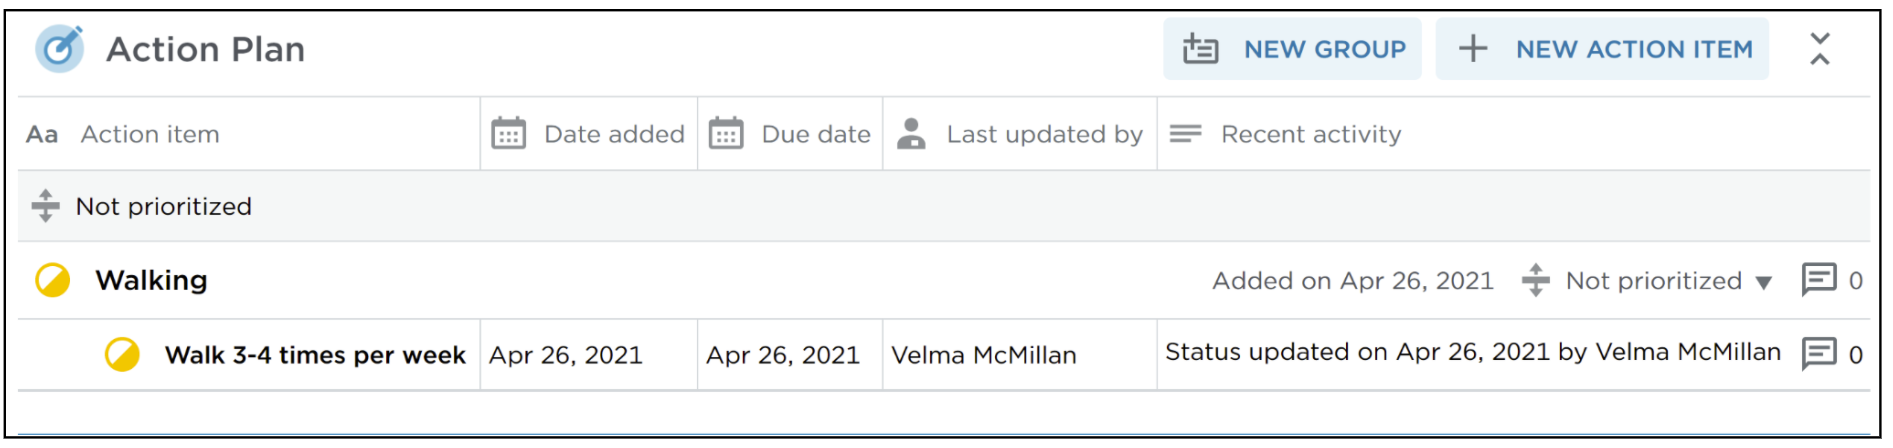
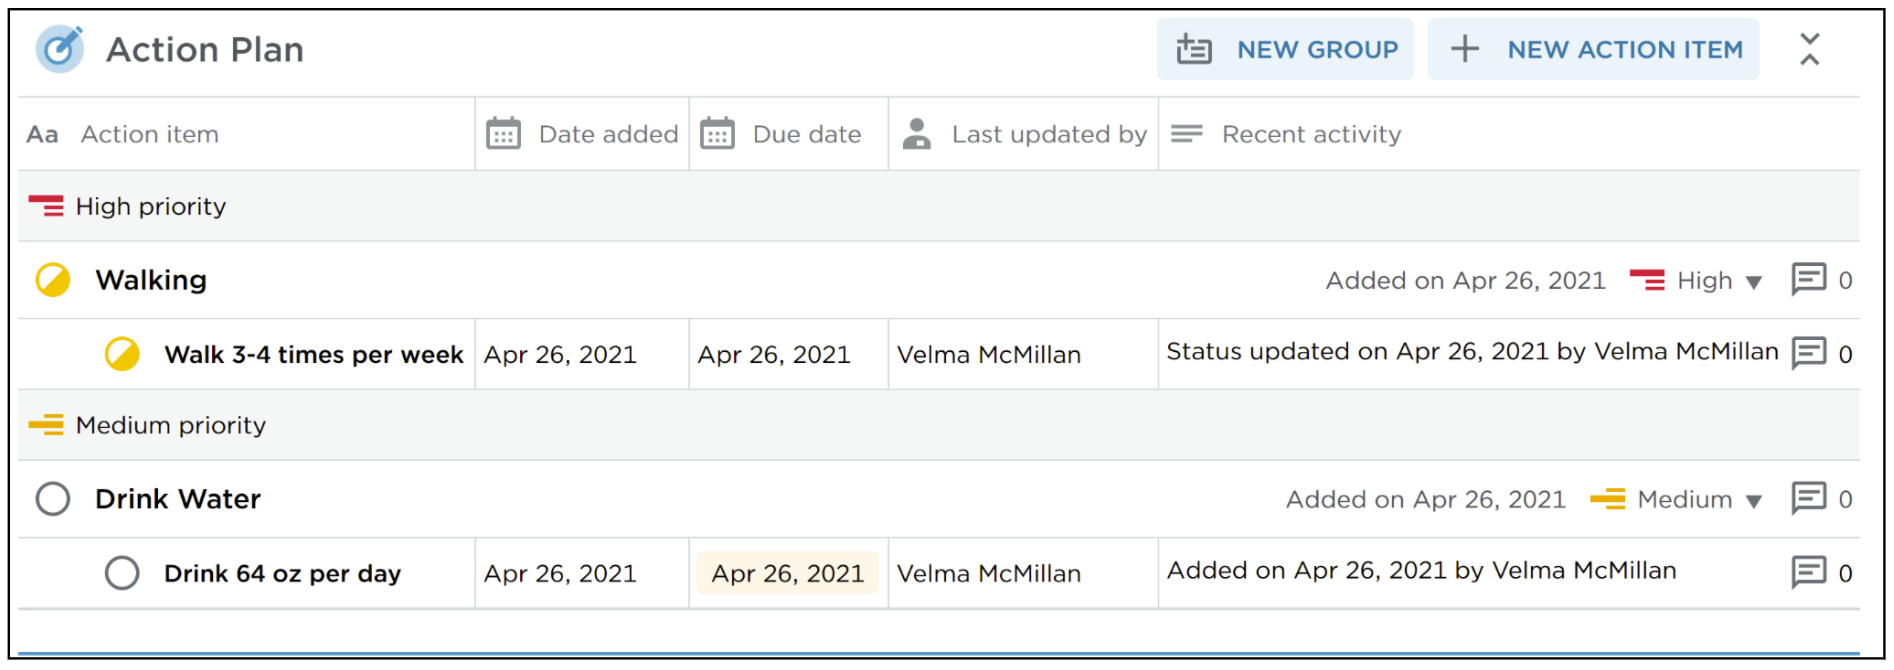
The Action Plan section on your My Welld Dashboard can be used to track personal and program specific goals or Action Items. Action Items can also be organized into Action Groups (e.g. Group=Walk and Action Items=walk 3 times per week). Note some programs will automatically set up Action items/goals, or you can add them on your own.
To add a new Action Plan Group, click the  button.
Once an Action Group has been added, Action Items can be added using the  button. Use the “Select Group” drop down list to choose which Group the Action Items will fall under, or use the link to Add new group.

Action Items will now display below their respective Group on the Program Enrollment page.
For each Group and Action Item there are several options in the left hand Group menu (![]() ) next to each item:
) next to each item:
Group Menu
Update status - changes the status of a Group or Action Item (see details later in this article on statuses).
See details - opens the Action Plan pop-up window (see details later in this article on the Action Plan pop-up window).
Edit group - brings up a modal where the Goal name can be edited.
Delete group - deletes a Goal. Note: you must first delete a Goal before it’s associated Group can be deleted.
Hide completed items - once an Action Item has been marked complete, you can hide them using Hide completed items. An Action Item can be unhidden by using the Show completed items.
Edit group - brings up a modal where the Group name can be edited.
Delete group - Removes the group and any Action Items associated with it. Note: you must first delete an Action Item(s) before it’s associated Group can be deleted.
See details - opens the Action Plan (see details later in this article on the Action Plan pop-up window sheet).

Action Item menu
Update status - changes the status of a Group or Action Item (see details later in this article on statuses).
See details - opens the Action Plan pop-up window (see details later in this article).
Edit group - brings up a modal where the Goal name can be edited.
Delete group - Note: you must first delete an Action Item(s) before it’s associated Group can be deleted.

Action Plan pop-up window - choosing “See details” from individual Group and Action Item menus will open the Action Plan pop-up window. This is a place where comments can be saved that pertain to an individual Group/Action item.
To add a comment, click in the "Add a note" field or click the comment icon (![]() ) on the far right side of any Group/Action item. Enter comments in the “Add comment” box, then click the SAVE button. The comment will now be counted to the right of the Group or Action Item in the comment icon (
) on the far right side of any Group/Action item. Enter comments in the “Add comment” box, then click the SAVE button. The comment will now be counted to the right of the Group or Action Item in the comment icon ().

To edit or delete a comment, open the Action Plan pop-up window, then use the three stacked dots icon ![]() to edit/delete a comment.
to edit/delete a comment.

Update status - Statuses for Groups and Action Items can be updated in the “Update status” option within each menu. A modal will open with a drop down list of status choices.

Each status type has a corresponding icon in the menu once chosen:
Open - displays a blank circle menu.
In progress - displays a yellow half filled circle.
Complete - displays a green check within a circle.
Blocked - displays a red “X” within a circle.
Priority - For each Group/Action Item set, a priority can be assigned (high/medium/low/not prioritized). Use the drop down list to the right of each Group to set the priority ( ).
).
Group/Action Item sets will be sorted in order of priority from high to low.
