To start, let's review a few definitions:
- Charged: The total amount Welld projects you will be paid based on your fee schedule and member utilization.
- Paid: The total amount the payor has told us they have paid
- Fee Schedule: The reimbursement terms in your contract are built into a fee schedule in Welld. This fee schedule converts the members' check-ins into the dollar value
- Claim: The "invoice" being sent to the payer. While Welld only sends visit data to the payors, we also use your fee schedule and member visits to estimate the value of the claim
- Remit: The per payor, per location detail of what the payer paid and when. "Matched Claims" are the claims included on the remit - one remit will have many claims on it.
- Utilization: The # of visits used / reimbursable total visits
- Balance: Charged minus Paid = Balance. A $0 balance means the claim was paid in full!
- Service Date: The month of the visits
- Reason Code: a short phrase describing the reason, if any, a claim was not paid by the payer.
When will I know how much I'm getting paid?
Welld creates Claims to submit to the payers on the 5th of each month for the previous month's member visits. This is why it's important to ensure members are connected properly to your MMS and any errors in Welld have been addressed by the 4th of the month.
Need help with updating a member in Welld?
Checkout the CHIRPS Troubleshooting Section for information on how to correct those errors!
Two sets of information are available within Welld after the 5th - Claims and CHIRPS Outcomes:
 Claims: Claims, or the invoiced amount being sent to the payer based on member's visits and your contracted fee schedule with the payer can be found in the "Visits" section, under Billing within the left navigation menu. Claims are only created on the 5th of each month, which is why it is important to have all data cleaned up by the 4th.
Individual Claim information is available by scrolling down within a member’s profile and clicking into a specific Claim row.

 CHIRPS Outcomes: You can find the estimated revenue to be paid, or the "Charged" amount in CHIRPS Outcomes under Stats within the left navigation menu. Welld stores the data as the amount “Charged” so it can be compared to the amount “Paid” once remit information is received from the payer.
When will I get paid?
All CHIRPS payments are in arrears, however the exact timing of payment does vary per benefit program.
Welld facilitates payments for One Pass and payment is made through Welld via ACH or Stripe. ASH and Tivity will continue to pay you directly (unless otherwise set through agreement terms).
Need Help Setting up a Stripe Account in Welld?
Check out this CHIRPS Finance Article!
- One Pass arrears payments can be expected 3-4 weeks after Welld has submitted Claims.
- Tivity and ASH arrears payments can be expected 4-5 weeks after Welld has submitted Claims.
When will payment information show in Welld?
Welld receives remit information back from the benefit programs as varying timelines. One Pass remit information is typically received 3-4 weeks after Welld has submitted Claims. Tivity and ASH can range from 4-6 weeks after Welld has submitted Claims.
Where can I find Remit information in Welld?
 Remit information can be found under the Billing section of the left navigation menu.
Remits:
The "Remits" tab displays the list of the payments and/or rejections from the payer. You can use the "Sort By" and "Filters" buttons to change the list display to suit your needs.

Viewing the Details of a Remit:
To view the details of a remit, click on that remit. You'll see the screen below which lists the "matched" claims that were paid on that remit.

Click on the "Info" droplist for further remit details:

You'll see the detail below so you can keep track of the summary information for the remit you are viewing.

If you want to see the details on a specific claim, click on that claim, and you will arrive on the claim detail screen:

Clicking on the Claim History (![]() ) icon will bring up a static list of previous claim actions for this claim.
) icon will bring up a static list of previous claim actions for this claim.

Click on the Comments (![]() ) icon to make a comment. This is an important way to keep track of what actions were taken, if any.
) icon to make a comment. This is an important way to keep track of what actions were taken, if any.

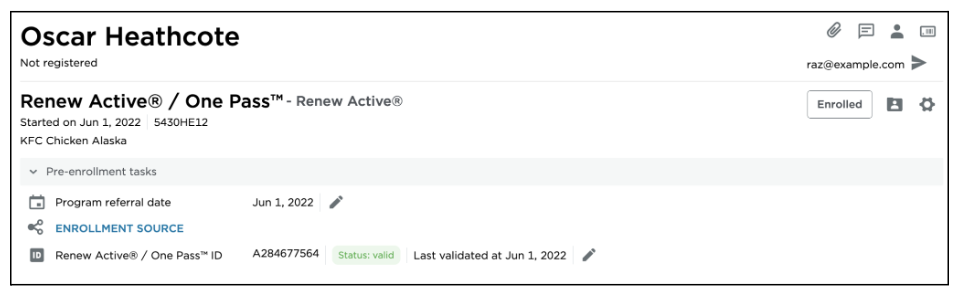
Lastly, click on the View User Info (![]() ) icon to easily go to the participant's Enrollment page.
) icon to easily go to the participant's Enrollment page.
Why was my Claim denied?
If a claim is denied, it will also contain a reason. Typical reasons can be:
- Submission period for this month is closed
- Member not eligible for sector/tier
- Resubmitted Record for Month and Year
- Invalid Record; Confirmation ID is not valid
- Duplicate record for Confirmation ID
Do I get paid for No Shows or Late Cancellations?
Check with your corporate HQ on the agreement for how special booking types will be reimbursed. This is typically decided during contract negotiations with the CHIRPs program, and Welld is designed to support whichever arrangement you have in place.
Was this article helpful?
If you liked this article, give us a 'Yes' on the helpful article question below. If we're missing something, please give us a 'No' and tell us what we're missing. Believe us, this product only gets better based on your feedback! You'll be helping us help the rest of the country in improving the health of communities everywhere